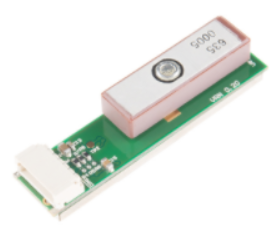
Like @Joan said, there is nothing to install for the GPS module (sort of).
It is UART, so you can hook it up a few different ways:
Direct UART
The Pi has two UART pins on the header already, so you can hook up the module to those pins. The only problem is that the module uses 5v logic, which would most likely harm the Pi, as it is only 3v3 tolerant. So you would need a voltage divider from 5v to 3v or a level converter hooked up to the TX pin (pin 3) of the module. [Pins are numbered from right to left with the PCB below the connector.]
Refer to page 4 of the data sheet.
Here are the connections:
GPS ––––––––––––––––––––––– Pi
Vin (Pin 1) –––––––––––––––––– 5v (Pin 2 or 4)
GND (Pin 2) –––––––––––––––– GND (Pin 6, 9, or 14)
TX (Pin 3) –Voltage Converter– RX (Pin 10)
RX (Pin 4) –––––––––––––––––– TX (Pin 8)
Note: You don't have to put a voltage converter on the RX pin of the GPS.
To interface with the device, you will need to disable the serial console of the RPi. To do this, enter sudo raspi-config scroll to Advanced, then Serial, hit no, and reboot your Pi.
Finally, you need to install screen with:
sudo apt-get install screen -y
Once that is finished, interface your GPS with:
screen /dev/ttyAMA0 9600
Sometimes screen doesn't work for the Pi's UART pins, in that case use the last two commands of this tutorial.
USB
Since the module communicates with 5v UART, you can buy a cheap UART to USB (PL2303hx) converter. Pin connections are as such:
USB Converter ––– GPS
5v –––––––––––––– Vin (Pin 1)
GND –––––––––––– GND (Pin 2)
TX –––––––––––––– RX (Pin 4)
RX –––––––––––––– TX (Pin 3)
[Pins are ordered from right to left, where the PCB is under the connector.]
To interface with the module you will need to install screen with:
sudo apt-get install screen -y
Then, look in /dev with ls /dev and look for something like tty.usbserial or tty.USB0 something along those lines.
The data sheet for the module says it has a 9600 baud rate, so to interface with the device:
screen /dev/tty.usbserial 9600
Remember to replace tty.usbserial with what yours is in /dev.
That's it for USB!
Hope this helped!

